A Crispy Delight: 5 Secrets to Perfect Fried Chicken Without Buttermilk
Fried chicken is a universally loved dish, known for its crispy exterior and juicy interior. But what if you’re out of buttermilk or simply want to try something new? This guide explores how to achieve that perfect fried chicken without buttermilk, ensuring a delicious outcome every time.
Why Skip Buttermilk?
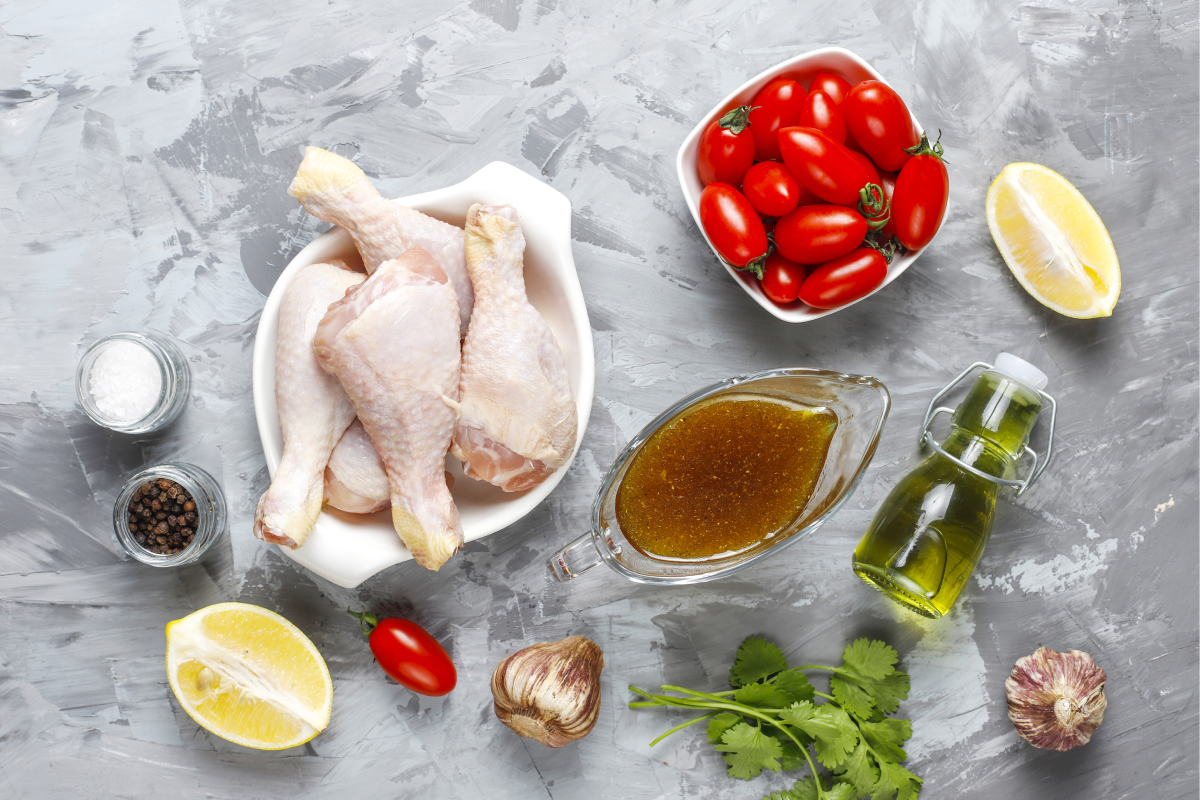
The recipe for crispy fried chicken without buttermilk from The Midwest Kitchen Blog presents a scrumptious option for those who opt to forego buttermilk. This technique involves enveloping the chicken in a seasoned flour blend, immersing it in an egg concoction, and then double-dipping it in the flour mix to forge a crispy exterior shell. The egg acts as a moisture sealant for the chicken, ensuring it remains succulent and juicy throughout the cooking process, making you forget all about the buttermilk. Subsequently, the chicken is fried in a cast iron skillet until it achieves a crispy and golden brown perfection. Essential components for this crispy fried chicken without buttermilk recipe encompass chicken pieces, eggs, all-purpose flour, and a medley of spices including salt, black pepper, cayenne pepper, ground paprika, dried thyme, dried rosemary, and onion powder. For frying, vegetable oil, with a preference for organic cold-pressed avocado oil, is recommended.
Buttermilk is traditionally used in fried chicken recipes for its ability to tenderize the chicken and add depth of flavor. However, dietary restrictions, allergies, or simply not having buttermilk on hand can lead you to look for alternatives. Learn more about the benefits of marinating chicken to understand how different ingredients can affect the texture and flavor of your poultry.
Key Ingredients for the Perfect Fry
Creating the perfect fry, whether it’s for vegetables, meats, or specifically for a classic like fried chicken, involves a combination of key ingredients and techniques. Here are the essential ingredients you’ll need to achieve that crispy, flavorful, and golden perfection:
- Protein or Vegetables: The star of your dish, whether it’s chicken, fish, vegetables like potatoes for fries, or other meats. The choice of protein or vegetable can influence the flavor and texture of your final dish.
- Flour: All-purpose flour is commonly used for creating the initial coating on your fry. It helps to adhere the batter and seasonings to the food. For a gluten-free option, you can use alternatives like rice flour or chickpea flour.
- Eggs: Eggs are used in many frying batters as a binding agent. They help to stick the flour or batter to the food, ensuring a crispy outer layer after frying.
- Seasonings: Salt, pepper, paprika, garlic powder, onion powder, and cayenne pepper are popular choices. Seasonings are crucial for flavor. They can be mixed into your flour or batter, or used to season the food directly.
- Breading or Batter: Beyond just flour, many recipes call for a secondary coating for extra crispiness. This can be breadcrumbs, panko, cornmeal, or a batter made from flour mixed with water, beer, or milk. The choice depends on the desired texture and flavor.
- Oil: A high smoke point oil is essential for frying. Vegetable oil, canola oil, peanut oil, and avocado oil are popular choices. The oil needs to be heated to the right temperature (typically between 350°F to 375°F) for the perfect fry.
Additional Tips for Achieving the Perfect Fry
- Leavening Agents (optional): Ingredients like baking powder or soda can be added to batters to make them lighter and crispier by creating air bubbles in the batter when cooked.
- Buttermilk or Milk (optional): For certain recipes, especially fried chicken, buttermilk is used to tenderize the meat and add a tangy flavor. If you’re avoiding buttermilk, a mixture of milk and a bit of vinegar or lemon juice can serve as a substitute, or you can skip it entirely for a different marinade.
- Cornstarch or Potato Starch: Mixing a bit of cornstarch or potato starch into your flour can create a lighter, crispier texture. These starches can withstand high temperatures without burning, making them perfect for a golden fry.
- Acidic Component (optional): Adding a touch of acidity, like vinegar or lemon juice, to your marinade or batter can enhance the flavors and tenderize the protein.
The perfect fry is not just about the ingredients but also about the technique—properly heating your oil, not overcrowding the pan, and allowing the fried food to drain on a wire rack or paper towels to remove excess oil. Experimenting with these key ingredients and adjusting based on your taste preferences and dietary needs will help you achieve the perfect fry every time.
The Perfect Fry
Achieving that perfect crispy texture is easier than you might think. The secret lies in the cooking technique and the oil you choose. For a deeper dive into frying techniques and tips for getting that golden, crispy exterior every time, discover our guide on choosing the right cooking oil.
Preparing Your Chicken
Preparing your chicken correctly is crucial for achieving the best flavor and texture, especially when frying. Here’s a step-by-step guide to preparing your chicken, ensuring it’s ready to be cooked to perfection:
1. Choose the Right Cut
- For frying: Thighs, drumsticks, wings, and breasts are all popular choices. Dark meat (thighs and drumsticks) tends to be juicier and more flavorful, while white meat (breasts and wings) cooks faster and offers a lighter option.
2. Cleaning and Trimming
- Rinse (optional): Some people prefer to rinse their chicken under cold water, although this practice is debated due to the risk of spreading bacteria. If you choose to rinse, ensure you clean the sink and surrounding areas thoroughly afterward.
- Trim excess fat: Use a sharp knife to trim off any excess fat or skin that won’t contribute to the cooking process. For skin-on recipes, you might want to keep some skin for extra flavor and crispiness.
3. Tenderizing and Marinating
- Tenderize: For thicker cuts like breast, you might want to tenderize the meat by gently pounding it to an even thickness. This ensures even cooking.
- Marinate: Marinating your chicken not only adds flavor but can also tenderize the meat. Ingredients like buttermilk, yogurt, or acidic components (lemon juice, vinegar) are excellent for marinating. Even a simple marinade of salt, pepper, and herbs can make a big difference. Marinate for at least 30 minutes, or overnight in the fridge for deeper flavor.
4. Drying
- Before coating your chicken for frying, pat it dry with paper towels. Removing excess moisture helps the coating stick better and results in a crisper finish.
5. Coating
- Seasoning: Season your chicken directly with salt and other spices before coating for more flavor.
- Flouring: Coat the chicken lightly in flour. This helps the batter or next layer of coating to adhere better.
- Battering: Dip the floured chicken in your batter or beaten eggs. This could be a simple egg wash or a more complex batter depending on the recipe.
- Final Coating: After the batter, you can coat the chicken in breadcrumbs, panko, or another layer of seasoned flour for extra crunch.
6. Resting
- Let the coated chicken sit on a wire rack for a few minutes before frying. This step helps the coating to set and stick to the chicken better during the frying process.
7. Frying
- Heat your oil to the correct temperature (usually between 350°F to 375°F). Use a thermometer to check.
- Fry in batches to avoid overcrowding, which can lower the oil’s temperature and result in soggy chicken.
- Cook until golden brown and the internal temperature reaches 165°F.
8. Draining
- Once cooked, transfer the chicken to a wire rack over a baking sheet to drain. This keeps the chicken crispy by allowing air to circulate around it, unlike paper towels which can cause steam and soften the crust.
9. Resting Before Serving
- Let the chicken rest for a few minutes before serving. This allows the juices to redistribute, ensuring your chicken is moist and flavorful inside.
By following these steps, you’ll prepare your chicken perfectly for frying, leading to delicious, juicy, and crispy results every time.
The Flour Mixture
The flour mixture is a critical component in achieving the perfect crust for fried foods, including chicken. It not only provides the base for the crispy outer layer but also carries the seasonings that flavor the crust. Here’s how to prepare an effective flour mixture for frying:
Ingredients:
- 2 cups all-purpose flour: Serves as the base of your mixture. For a gluten-free option, you can substitute with rice flour or a gluten-free all-purpose flour blend.
- 1 tablespoon salt: Essential for seasoning. Adjust according to taste.
- 2 teaspoons ground black pepper: Adds a slight heat and depth of flavor.
- 1 teaspoon paprika: Offers color and a sweet, smoky flavor. You can use sweet or smoked paprika depending on your preference.
- 1/2 teaspoon garlic powder: Provides a subtle garlic flavor without the moisture of fresh garlic, which is ideal for a dry mix.
- 1/2 teaspoon onion powder: Adds a savory depth of flavor.
- 1/4 teaspoon cayenne pepper (optional): For those who like a bit of spice. Adjust the amount to control the heat level.
- 1 teaspoon dried herbs (optional): Such as thyme, oregano, or rosemary. Choose based on the flavor profile you’re aiming for.
Directions:
Combine Dry Ingredients
- Preparation: In a large bowl, whisk together the flour, salt, black pepper, paprika, garlic powder, onion powder, cayenne pepper (if using), and any dried herbs. This ensures that the seasonings are evenly distributed throughout the flour.
Customize Your Mix
- Personalization: Feel free to adjust the seasonings based on your personal taste preferences or the specific dish you’re preparing. Adding different spices or adjusting the quantities can create a unique flavor profile.
Use for Coating
- Application: When you’re ready to use your flour mixture for frying, dredge your prepared chicken or other foods in the mix. Ensure each piece is thoroughly coated for the best results. Shake off any excess flour to avoid clumping and ensure an even, crispy coating.
Double Dipping (Optional)
- For Extra Crispiness: For an extra crispy crust, you can double dip your chicken. After the initial coat of flour, dip the chicken into a wet mixture (such as beaten eggs or buttermilk), then dredge it in the flour mixture again. This creates a thicker coating that becomes especially crispy when fried.
Rest Before Frying
- Pre-Frying Step: Allow the coated chicken to rest on a wire rack for 10-15 minutes before frying. This helps the coating to adhere better and prevents it from falling off during the frying process.
Frying
- Cooking Method: Fry in hot oil (350°F to 375°F) until golden brown and cooked through. The exact time will depend on the size and type of the chicken pieces.
Serving
- Final Touch: Once fried to a perfect golden brown, let the chicken rest on a clean wire rack to keep the crust crispy. Serve hot for the best texture and flavor.
This flour mixture can be the foundation of countless delicious fried dishes, providing a crispy, flavorful crust that enhances the overall dish. Experiment with different spices and herbs to tailor the mixture to your specific taste preferences and culinary needs.
Fried Chicken Recipe Without Buttermilk
For those looking for a delicious fried chicken recipe without the use of buttermilk, here’s a simple yet flavorful alternative that ensures your chicken is crispy on the outside and juicy on the inside. This recipe uses a straightforward flour mixture and egg wash to achieve that perfect crust.
Ingredients:
For the Chicken:
- 4 lbs chicken pieces (legs, thighs, breasts, wings)
- Salt and pepper, to taste
- 1 teaspoon garlic powder
- 1 teaspoon onion powder
- 1/2 teaspoon paprika (optional for color and a hint of smokiness)
For the Flour Mixture:
- 2 cups all-purpose flour
- 1 tablespoon salt
- 2 teaspoons ground black pepper
- 1 teaspoon paprika
- 1/2 teaspoon garlic powder
- 1/2 teaspoon onion powder
- 1/4 teaspoon cayenne pepper (adjust to taste for heat)
Egg Wash Preparation:
- 3 large eggs
- 1/4 cup water or milk
Frying Essentials:
- Vegetable oil, for deep frying
Instructions:
1. Prepare the Chicken:
- Season the chicken pieces with salt, pepper, garlic powder, onion powder, and paprika. Let them sit for at least 15 minutes, or refrigerate for a few hours for deeper flavor penetration.
2. Make the Flour Mixture:
- In a large bowl, mix together the flour, salt, black pepper, paprika, garlic powder, onion powder, and cayenne pepper until well combined.
3. Prepare the Egg Wash:
- In another bowl, beat the eggs with water or milk until well mixed.
4. Dredge the Chicken:
- Dip each piece of chicken into the flour mixture, coating it thoroughly. Shake off the excess flour.
- Dip the floured chicken into the egg wash, ensuring it’s completely covered.
- Dredge the chicken back into the flour mixture for a second coat. Again, shake off any excess.
5. Fry the Chicken:
- Heat the oil in a deep fryer or large pot to 350°F (175°C). You’ll need enough oil to cover the chicken pieces.
- Carefully place the chicken pieces into the hot oil. Do not overcrowd the pot; cook in batches if necessary.
- Fry the chicken until golden brown and cooked through, about 15-20 minutes, depending on the size of the pieces. The internal temperature should reach 165°F (74°C) when checked with a meat thermometer.
- Remove the chicken from the oil and let it drain on a wire rack or paper towels to remove excess oil.
6. Serving:
- Serve the fried chicken hot, with your choice of sides like mashed potatoes, coleslaw, or a simple green salad.
Tips:
- Letting the coated chicken sit for a few minutes before frying can help the coating adhere better.
- Adjust the heat as necessary during frying to maintain the oil temperature for the best results.
- Always use a thermometer to ensure the chicken is fully cooked to the safe internal temperature.
This fried chicken recipe without buttermilk is a great alternative for those who prefer not to use buttermilk or are looking for a different flavor profile. The key to crispy, flavorful fried chicken lies in the seasoning and the double coating, ensuring every bite is delicious.
Serving Suggestions
Once you’ve mastered this fried chicken recipe, you’ll want to pair it with the perfect sides. Whether you’re in the mood for something light like a fresh salad or something more indulgent like mac and cheese, we have plenty of suggestions. Explore our favorite side dishes to complete your meal.
Healthier Alternatives to Frying
While fried foods are undeniably delicious, they’re not always the healthiest option due to the high fat and calorie content associated with deep frying. Fortunately, there are several healthier cooking methods that can give you the flavor and texture similar to frying without the extra oil. Here are some healthier alternatives to frying:
1. Air Frying
- How it Works: Air fryers use hot air that circulates around the food to cook it, producing a crispy outer layer similar to deep frying.
- Benefits: Requires little to no oil, significantly reducing fat content. It’s also easy to use and clean.
- Best For: Chicken wings, French fries, vegetables, and small bites.
2. Baking or Roasting
- How it Works: Cooking in an oven using dry heat. For a texture similar to frying, you can lightly coat your food in oil and use a high temperature.
- Benefits: Reduces the amount of fat compared to frying and is suitable for larger dishes.
- Best For: Chicken, fish, root vegetables, and homemade chips.
3. Broiling
- How it Works: Uses high heat from an overhead source in the oven, cooking food quickly and creating a crispy, browned exterior.
- Benefits: Quick cooking method that doesn’t require much oil. It’s great for caramelizing and charring.
- Best For: Meat, fish, poultry, and vegetables.
4. Grilling
- How it Works: Cooks food by applying direct heat from below. This method can impart a smoky flavor, especially when done outdoors.
- Benefits: Excess fat drips away from the food, reducing calorie intake. Grilling also adds unique flavor.
- Best For: Meats, vegetables, and fruits.
5. Steaming
- How it Works: Cooks food using the steam from boiling water. While it doesn’t create a crispy texture, it’s incredibly healthy.
- Benefits: Preserves the nutrients in food better than most cooking methods and doesn’t require oil.
- Best For: Vegetables, fish, and dumplings.
6. Sautéing
- How it Works: Uses a small amount of oil or broth in a hot pan to cook food quickly.
- Benefits: Allows for control over the amount of fat used and can develop deep flavors through caramelization.
- Best For: Vegetables, shrimp, and thin cuts of meat.
7. Pan-frying
- How it Works: Similar to sautéing but uses slightly more oil and lower heat, allowing the food to cook through more thoroughly.
- Benefits: Requires less oil than deep frying and can achieve a somewhat crispy texture.
- Best For: Chicken breasts, fish fillets, and pancakes.
8. Poaching
- How it Works: Gently cooks food by submerging it in a liquid at a low temperature.
- Benefits: Very low in fat since it requires no oil, and keeps food moist and tender.
- Best For: Eggs, fish, and chicken.
Tips for Healthier Cooking:
- Use Healthy Oils: If you’re using oil, opt for healthier options like olive oil, avocado oil, or coconut oil.
- Incorporate Spices: Boost flavor without adding extra fat by using herbs, spices, and citrus.
- Choose Lean Cuts: Opt for leaner cuts of meat to reduce fat content.
- Mind Portion Sizes: Even healthier cooking methods can lead to overeating if not mindful of portion sizes.
By exploring these alternatives, you can enjoy your favorite dishes in a healthier way, without sacrificing flavor or satisfaction.
Common Mistakes to Avoid
When aiming for healthier cooking and eating habits, it’s easy to fall into certain traps that can undermine your efforts. Here are some common mistakes to avoid, along with tips for staying on track:
1. Overusing Healthy Fats
- Mistake: Even healthy fats like olive oil and avocado oil are high in calories. Using too much can quickly increase the calorie count of your dish.
- Tip: Measure oils with a teaspoon or tablespoon rather than pouring directly from the bottle to control the amount used.
2. Not Reading Labels Carefully
- Mistake: Foods marketed as “low-fat” or “healthy” can still be high in sugar, sodium, or calories.
- Tip: Always read nutrition labels and ingredient lists to understand what you’re really consuming.
3. Skipping Meals
- Mistake: Skipping meals can lead to overeating later in the day or making poor food choices out of excessive hunger.
- Tip: Aim for regular, balanced meals to maintain energy levels and control hunger.
4. Ignoring Portion Sizes
- Mistake: Even healthy foods can contribute to weight gain if eaten in large quantities.
- Tip: Use measuring cups, a food scale, or visual cues (like the palm of your hand for proteins) to keep portions in check.
5. Choosing Refined Grains Over Whole Grains
- Mistake: Opting for white bread, pasta, and rice over their whole-grain counterparts reduces your intake of fiber and other nutrients.
- Tip: Switch to whole grains to increase your dietary fiber, which can help you feel fuller longer and improve digestive health.
6. Not Including Enough Variety
- Mistake: Eating the same foods repeatedly can lead to nutritional gaps and diet fatigue.
- Tip: Incorporate a wide range of fruits, vegetables, whole grains, lean proteins, and healthy fats into your diet to ensure you’re getting a broad spectrum of nutrients.
7. Forgetting About Beverages
- Mistake: High-calorie drinks like sodas, specialty coffees, and even smoothies can add a significant number of calories without providing the same satiety as solid food.
- Tip: Drink water, herbal teas, or black coffee, and be mindful of the calorie content of liquid refreshments.
8. Relying Too Much on Processed Foods
- Mistake: Processed foods can be convenient but often contain unhealthy fats, added sugars, and high levels of sodium.
- Tip: Focus on whole, minimally processed foods for the majority of your meals.
9. Not Planning Ahead
- Mistake: Failing to plan meals and snacks can lead to last-minute choices that are less healthy.
- Tip: Plan your meals and snacks in advance, and prepare them ahead of time if possible.
10. Underestimating the Power of Seasoning
- Mistake: Assuming healthy food must be bland and uninteresting.
- Tip: Use herbs, spices, vinegar, and citrus to add flavor without extra calories or sodium.
By being mindful of these common pitfalls and making conscious choices, you can maintain a healthy and enjoyable diet that supports your overall well-being.
FAQS
What can I use instead of buttermilk for fried chicken?
- Milk and Vinegar/Lemon Juice Mixture: Combine one cup of milk (whole or 2%) with one tablespoon of white vinegar or lemon juice. Let it sit for about 5 minutes until it slightly curdles. This mixture mimics the acidity and tang of buttermilk.
- Yogurt: Plain yogurt, thinned out with a little milk or water, can be a great substitute for buttermilk. It has the tanginess and the thick consistency that coats the chicken well.
- Sour Cream: Like yogurt, sour cream can be diluted with a bit of milk or water to achieve a buttermilk-like consistency. It adds richness and tang to the chicken.
How to make fried drumsticks without buttermilk?
To make fried drumsticks without buttermilk, you can use any of the substitutes mentioned above. Here’s a simple method:
- Prepare the Marinade: Choose your substitute (e.g., milk and lemon juice mixture) and pour it over the drumsticks in a bowl. Add your preferred seasonings, such as garlic powder, paprika, salt, and pepper. Let it marinate for at least 30 minutes, or overnight in the fridge for deeper flavor.
- Dredge and Fry: Remove the drumsticks from the marinade, dredge them in seasoned flour or a flour-cornstarch mixture for extra crispiness, and fry in hot oil until golden brown and cooked through.
Can you use eggs instead of buttermilk for fried chicken?
Yes, eggs can be used as part of the coating process for fried chicken, though they don’t serve the same tenderizing function as buttermilk. To use eggs:
- Beat Eggs: Whisk together a couple of eggs with a tablespoon of water or milk to thin them out.
- Dip the Chicken: After seasoning your chicken, dip it in the beaten eggs, then dredge in flour or breadcrumbs.
- Fry: Cook in hot oil until the chicken is golden and crispy.
This method helps the coating stick to the chicken and provides a crispy exterior.
Can I use regular milk instead of buttermilk to soak chicken?
Yes, you can use regular milk to soak chicken, though it lacks the acidity of buttermilk which helps in tenderizing. To mimic buttermilk’s tenderizing effect, add a tablespoon of vinegar or lemon juice to each cup of milk and let it sit for a few minutes before using. This will not only tenderize the chicken but also infuse it with a subtle tanginess similar to buttermilk.